Return to The New Adventures of R/C Flying

The PT-19 Build Log

A Scratch-Building Experiment

I decided that it would be very satisfying to try to build a model completely from scratch — something I have never tried before. The challenge would be to create a flyable model, despite being a relative newcomer to this hobby. These days, aircraft can be constructed from a variety of lightweight materials. For this project, I decided to use traditional balsa construction, covered with monokote. This would be blazing new trails for me — sort of. I have, of course, built a few planes from kits which included pre-cut balsa parts, but it’s been awhile. In fact, the last time I did this was about 44 years ago, when the current technology included a slow-drying glue, lots of straight pins, and tissue paper for the “skin”. This time, I won’t have the benefit of pre-cut parts, so I’d need to make them myself. Modern technology gives a big boost to the construction process with instant-bonding cyanoacrylate glue (Superglue) and a mylar-type covering that “shrink-wraps” to the model. The challenge was to build something lightweight enough to fly well while maintaining a sturdiness to withstand potential crashes.


Sunday, September 23

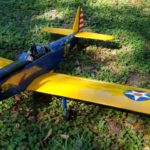
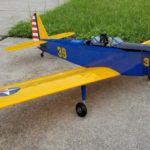
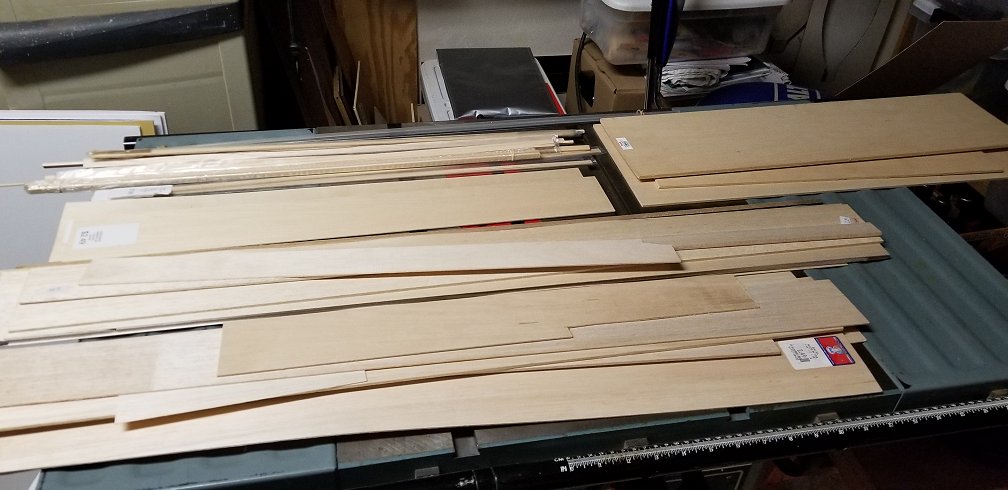
Even though I had sheets of balsa and basswood to create the necessary parts, I needed a full-size plan to ensure that the shape and proportions are accurate. There are plans for RC aircraft all over the World Wide Web; I wanted one that was interesting and not too complicated. After checking out several possibilities, I decided on a Fairchild PT-19 Cornell — a WWII-era trainer.


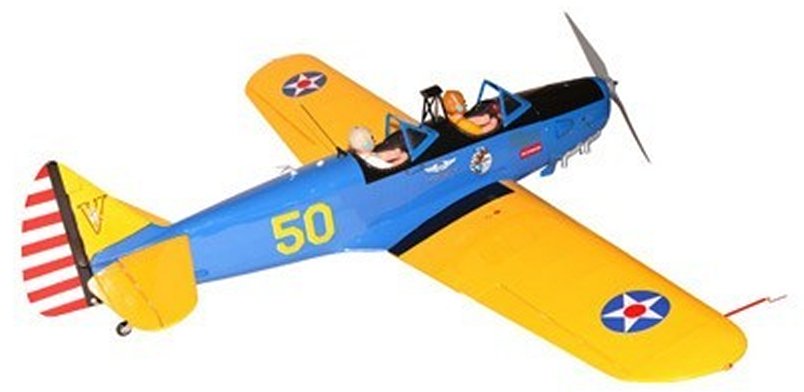
An Internet search for a plan unearthed several possibilities and I chose one that seemed to be clear and straightforward, from a 2013 Model Aviation Magazine article.


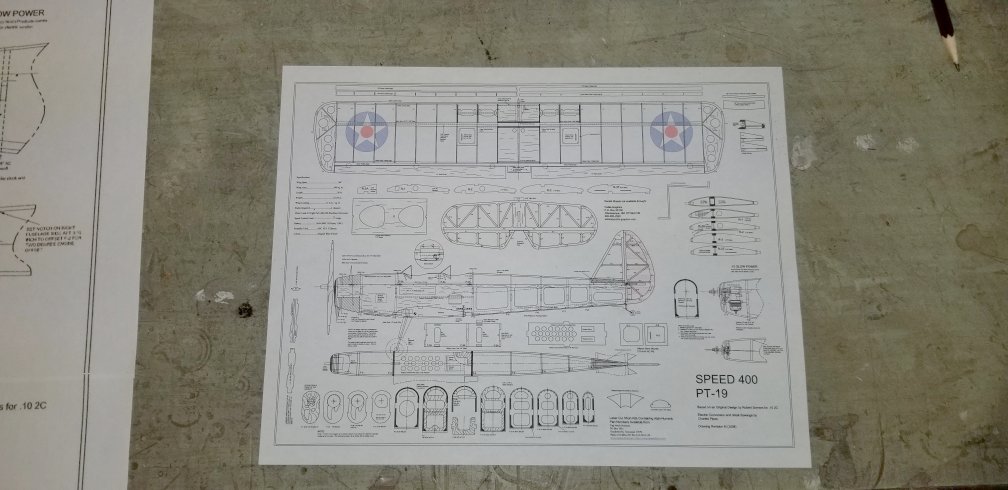
Of course, if I used the original PDF printout to build on, the wingspan would be only 9 inches — not practical for this purpose but might be an interesting future challenge. [ I later realized that the downloaded PDF plan was already to scale but I didn’t choose the correct setting during printing. Oh, well — live and learn!] Years ago, I had been introduced to a website called Block Posters, a free service that could take any image and blow it up to almost any size. I only needed to glue and tape the multiple sheets together to create the full-size plan. The model in the article has a wingspan of 40″, but I decided that a 27″ wingspan (1/16 scale) would make the model a little easier to lug around.

I then prepped my workshop for model building, consolidating my stash of balsa and basswood.

Monday, September 24
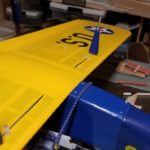
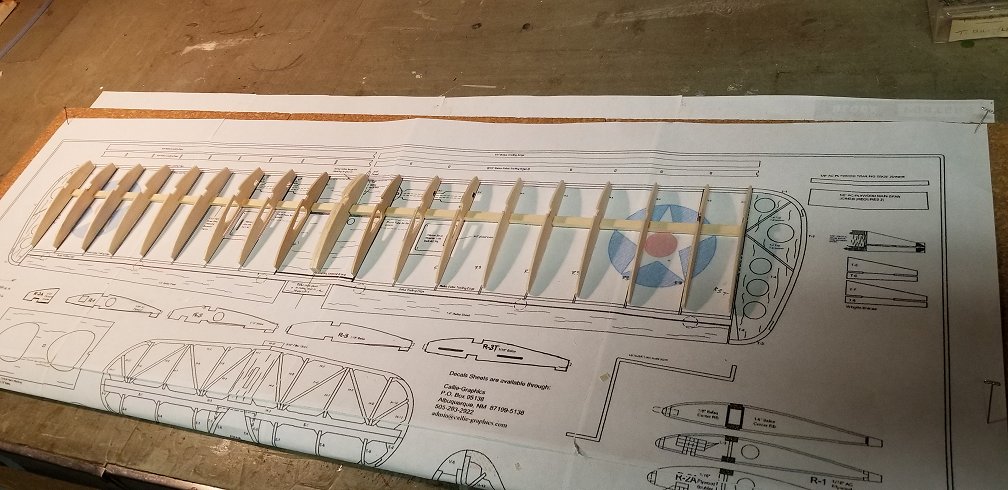
Building the Wing

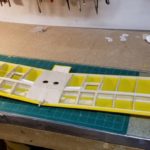
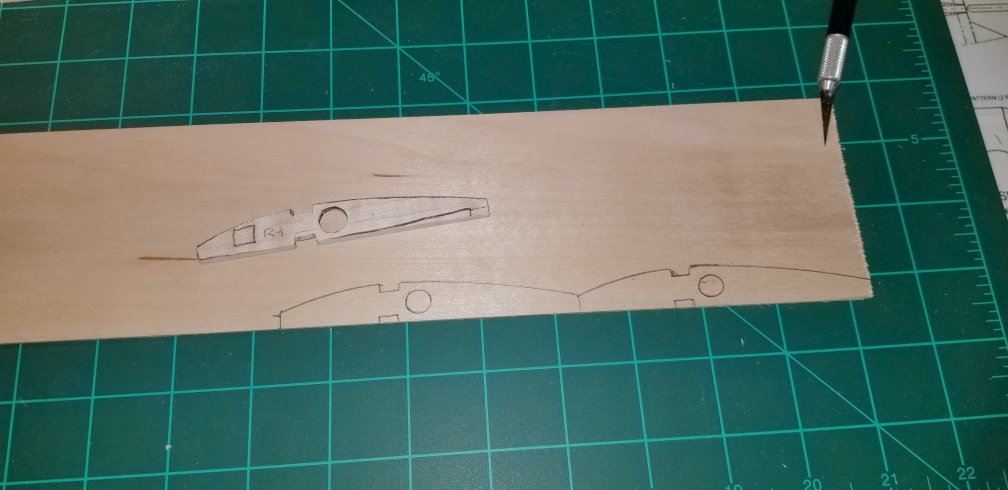
Again, this was the very first time I have created a model that didn’t have parts already cut out, so I had to problem-solve from the get-go. I was reluctant to cut up my plans, so I used carbon paper to transfer the designs onto the wood. I started with the wing.

This really took me back–the last time I did this, I was a teenager in high school. The nostalgia was enhanced by my background music from the 70’s, although it’s from SiriusXM instead of an AM radio station.

Tuesday, September 25

Bracing was added and the ailerons. I had quite a few plastic hinges that I’d been saving for years and found an old hinge tool that enabled me to make the necessary slots for the aileron hinges.

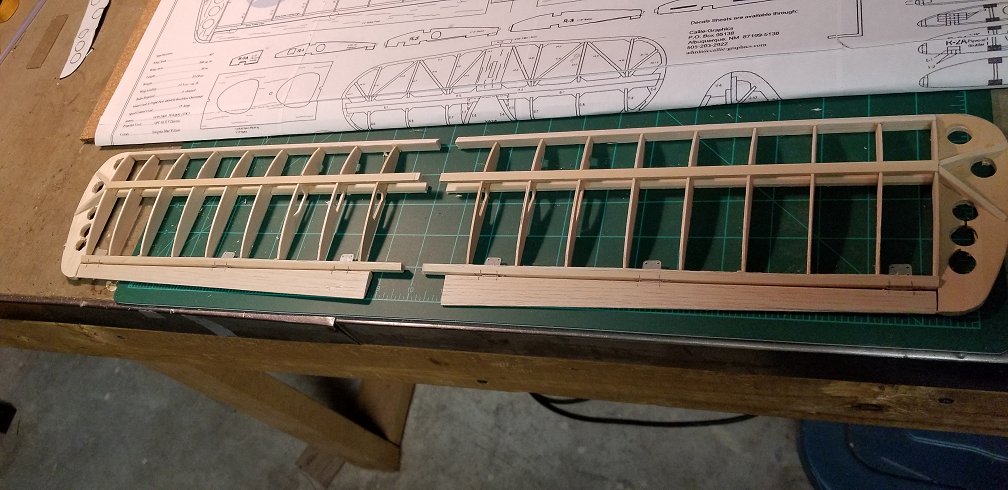
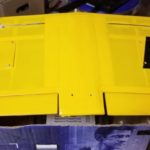
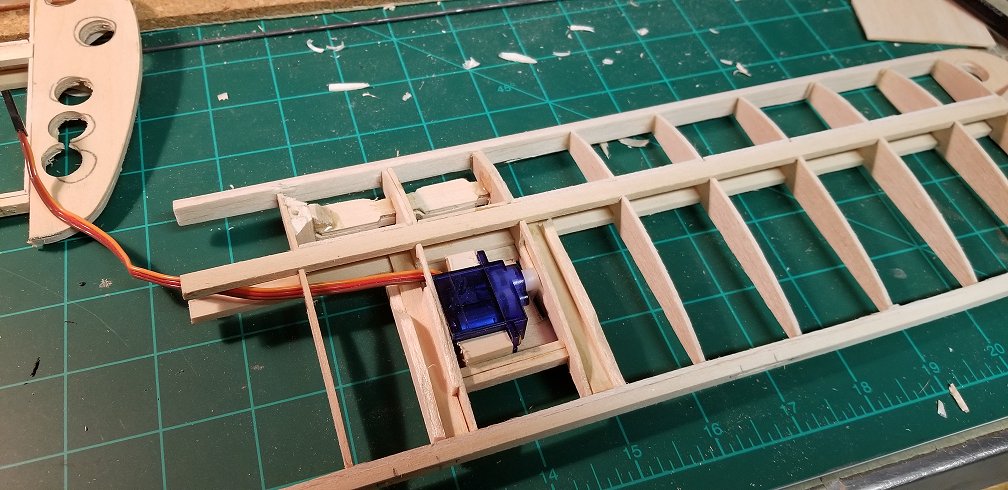
I also built the hatches that would house the micro servos.

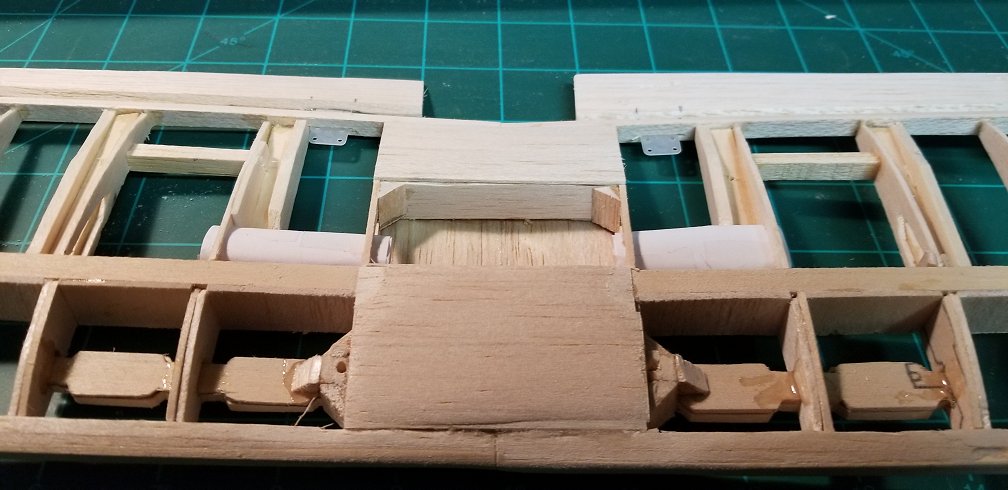
Wednesday, September 26

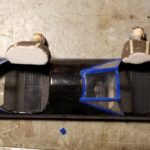
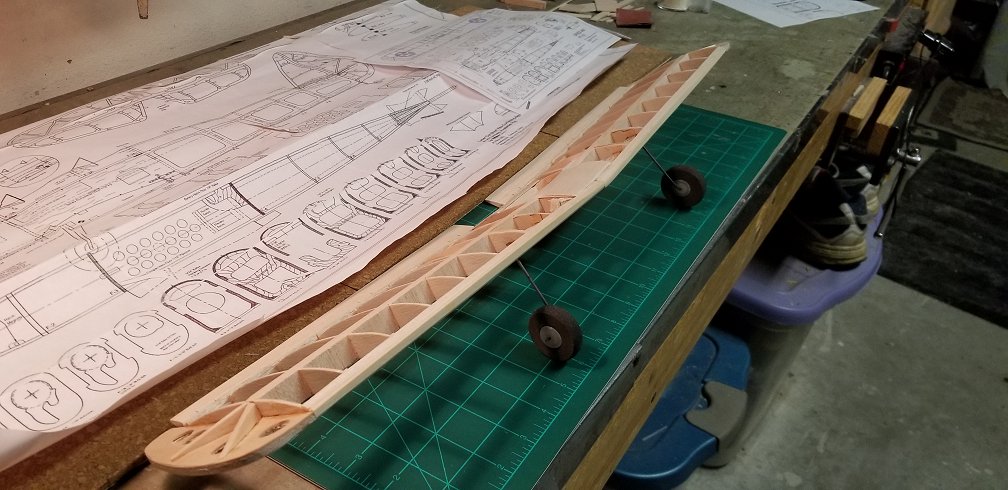
With the basics of the wing complete, the next system to work on was the landing gear and supports. For the gear, it was necessary to reinforce the wing ribs that would be stressed by the act of landing. I also needed to secure these areas with epoxy for additional strength. I attached the parts that set the dihedral and glued together the left and right wings.

The gears are 1/8th inch wires that I bent to match the design on the plan.

Friday, September 28

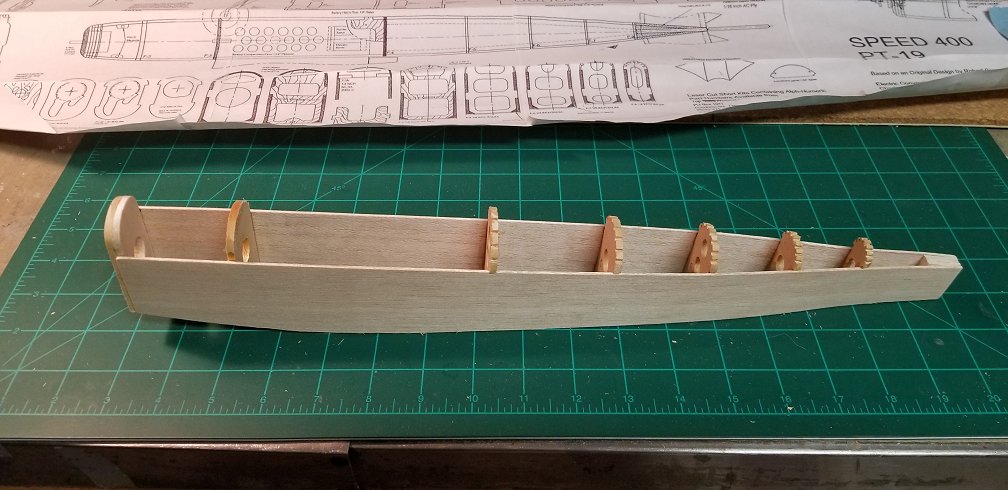
With the wings mostly done, it was time to start on the fuselage. I didn’t like the carbon-paper method of copying the parts, so I decided to go ahead and cut out the pieces from the plan and stick it on the wood for a cutting guide. I still wanted to keep the main plan intact, so I made a copy of the section I needed and cut out those parts, attaching them to the balsa with Scotch Restickable  glue stick..

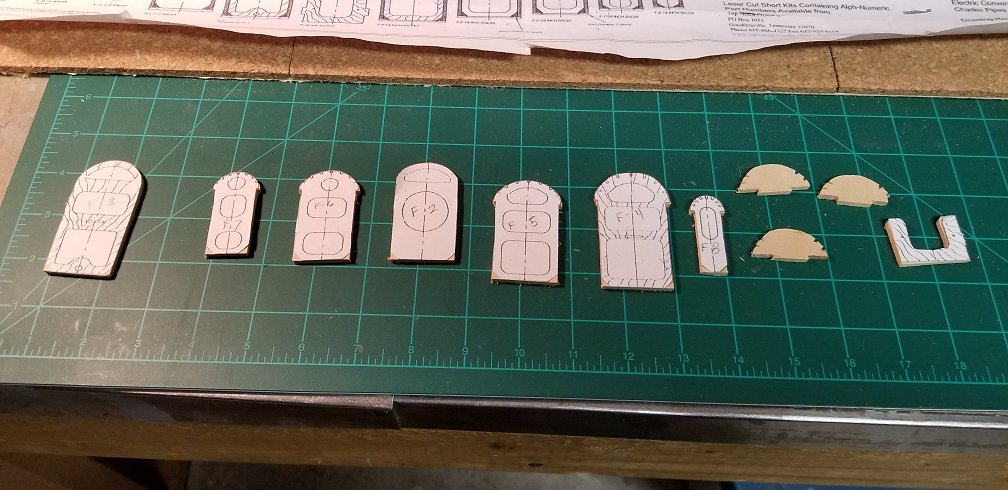
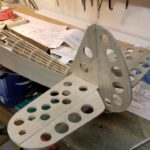
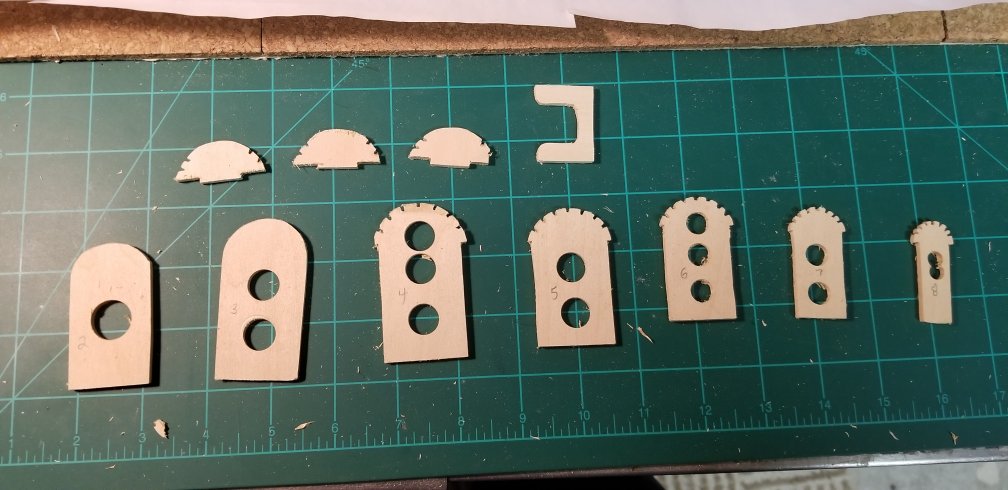
I peeled off the guides and cut holes to lighten up the pieces.

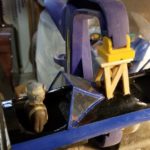
Using the plan, I put the formers in place…

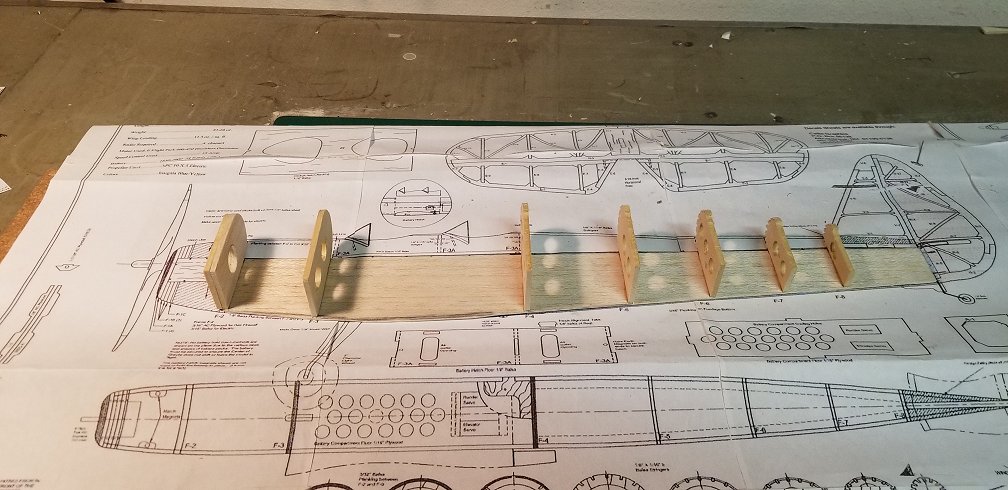
and attached the other side.

The PT-19: Take Two

Sunday, September 30 At this point, I had a partially-built fuselage in my hands and I suddenly realize that none of the motors I currently had in stock would fit this plane. I had already noticed that the micro servos in the wing barely fit within the wing ribs. I did like the 1/16th scale …

The PT-19: The Fuselage

Tuesday, October 9 With the wings mostly complete, I begin on the fuselage. Again, this will be my chance to correct anything I feel I didn’t get perfect on the smaller model, as least until I reach the same stage of construction. I stash the wing part of the plan and schlep down the fuselage …

The PT-19: Motor Mount and Cowl

October 14, 2018 Throughout this project, I have had to modify things as needed because I’m having to create my own kit and don’t have the benefit of detailed instructions. Of course, I do have the full-size plans and they are often enough to work with. However, mounting the engine is a critical step, and …

The PT-19: Tail Work and Control Rods

November 26, 2018 Time to construct the horizontal and vertical stabilizers along with the rudder and elevator. The plan shows these surfaces built from curved pieces and stringers, which would work beautifully if they were already cut out. I could build these pieces exactly as called for, but life’s too short for that. I’m going …

The PT-19: Fitting the Wing

November 29-30, 2018 If I’m going to have any chance to be successful flying this model, it is imperative that the wing is perfectly aligned and with the proper amount of incidence to optimize the airflow. This part took far longer than it should — because I’m a novice at this, I had to rely …

The PT-19: Covering the Tail & Wings

December 10-12, 2018 It’s been about 45 years (I was in high school) since I covered a balsa wood airplane — a WWI Spad biplane — and that covering consisted of very thin tissue paper pasted onto the wood with strong-smelling model dope. A spritz of water would serve to shrink and tighten up the …

The PT-19: Covering the Fuselage

January 23-24, 2019 The technique is basically the same for the fuselage as for the wing. The UltraCote sticks smoothly to the solid surfaces. I prepped the surface by using the “woodpecker” tool to poke small holes into the solid balsa sheeting, ensuring that air can escape and minimize the chances of bubbles. The instructions …

The PT-19: Decal Research and Details

January 25, 2019 In one of the construction guides for this plane, it suggested acquiring the proper decal graphics from Callie Graphics (https://callie-graphics.com/ ), but in keeping with my desire to scratch build as many components as possible, I figured I could create my own. I searched the Web for PT-19 decals and found several …

The PT-19: Tail Work & Top Surfaces

January 27-31, 2019 I epoxied the vertical and horizontal stabilizers in place at the rear of the fuselage, taking care that the horizontal stab was level and perfectly aligned with the wings. It just needed some strengthening fairings at the corners, which I also secured with epoxy. These fairings I constructed out of some scrap …

The PT-19: Decals & Windscreens

February 11, 2019 I researched the insignia and other decorations used on the actual plane, noting and estimating the correct proportions. By using the measurements on the model, I could determine the actual size of the decals I needed. I downloaded the images, sized them appropriately and printed them out. The most complex decal was …

The PT-19: Building Foam Pilots

February 20, 2019 I like to have pilots in my planes if possible (so I have someone to blame if it crashes). I found a couple of candidates at a thrift store. Since I only needed a figure from the chest up, any appendages were superfluous. I am also limited by the width of the …

The PT-19: Painting the Pilots

April 4-6, 2019 After experimenting with the molds, I ended up with two copies of each figure. This gave me the opportunity to choose the two best examples. Of course, they are not going to be as nice as pilots one can purchase, but not too bad. I created them from scratch. In the future, …

The PT-19: The Roll Bar

April 7, 2019 I’d like to have this model be an accurate representation of the actual plane. I noticed that in all of the pictures of the actual plane, there is a structure between the two cockpits. My initial interpretation was that it served as a brace for the wings; a typical setup in the …

The PT-19: Landing Gear Covers

April 9-10, 2019 The original PT-19 did not have retractable landing gear, which is nice because I can keep this model close to scale and not have to fool with retracts. The plan came with trapezoidal shaped coverings for the wire gear. While not exactly scale, they look better than the bare wire. I had …

The PT-19: Model Exterior Complete

April 22, 2019 Almost seven months to the day, my PT-19 Cornell is complete — as a scale model. At this point she is… I believe the term is… “a Hanger Queen”. To say I am pleased with the results so far would be an understatement. In the process of her creation, I have attempted …

The PT-19: Empennage Controls

June 28, 2019 After taking a break from construction for a couple of months, it’s finally time to add the stuff to make this a flying model. Installing the control rods and servos, along with the required electronics is something with which I do have some experience. The trick is to work through any idiosyncrasies …

The PT-19: Rigging the Ailerons

June 29, 2019 With the elevator and rudder taken care of, I turned my attention to the ailerons. The control rods needed were much shorter than what I used for the tail surfaces, so I used scrap wire which did not have threads. I used z-bend pliers to create a link on one end. I …

The PT-19: Powering Up

June 30, 2019 It was finally time to add the electronics and see her in action. The heart of the system will be a Lemon 7-channel receiver with stabilization. Because of the stabilization, it needed to be mounted lined up with one end facing the front and the other facing the tail. Because I needed …

The PT-19: Final Touches

July 4, 2019 A couple days ago, I purchased several new pushrods at the Hobby Shop. These were all 2mm in diameter and threaded on one end. It was a simple matter to remove the other rods, cut the new ones to the same length, and re-insert them into the tubes. They seemed to move …

The PT-19: Completed at Last

June 5, 2019 I brought my newly minted model to the field the next day. I had recently acquired a wattmeter to check the power configuration and I wasn’t sure how it worked. Dave viewed the meter with the plane running and declared it was in good order.   My wife, Kim, continues to ask …