
October 14, 2018
Throughout this project, I have had to modify things as needed because I’m having to create my own kit and don’t have the benefit of detailed instructions. Of course, I do have the full-size plans and they are often enough to work with.
However, mounting the engine is a critical step, and I don’t have enough information to work with. I did go ahead and build the front formers.
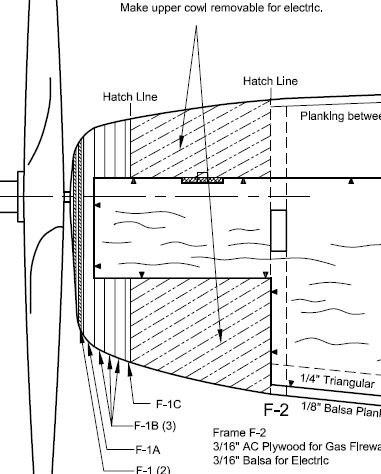
The plan doesn’t really show how best to mount the motor, so I am going to re-design this, building a plywood box which I’ll secure to the front bulkhead, and hollow out the cowling, which I’ll attach with magnets. I did some research, and that seems to be the way most planes do this.
Of course, I decided all this after I made the cowling formers as indicated on the plan. I like how these turned out, but will probably be forced to scrap them.
Here’s the project thus far, before I leave for a week or so in Tennessee, visiting family.

Wednesday, October 31 – Thursday, November 1
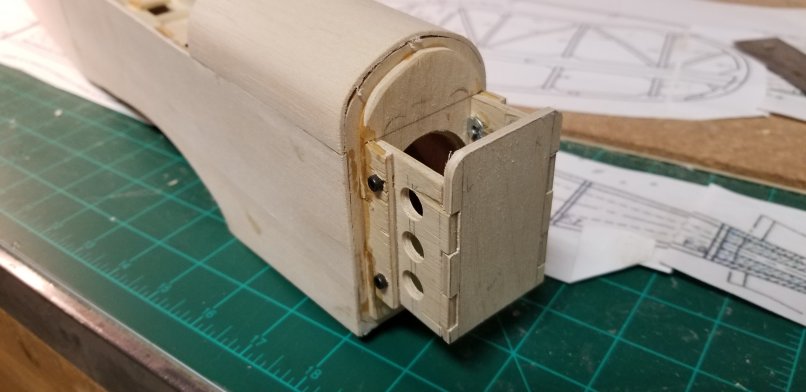
I don’t have much experience with motor mounts and things, other than what I’ve seen. I have the motor I want to use, so that’s what I’ll build around while still being able to change out the motor as necessary. I will build in some “breakaway” points that may help in the event of a crash. The first thing to do is use the plan to determine placement in the proper scale.
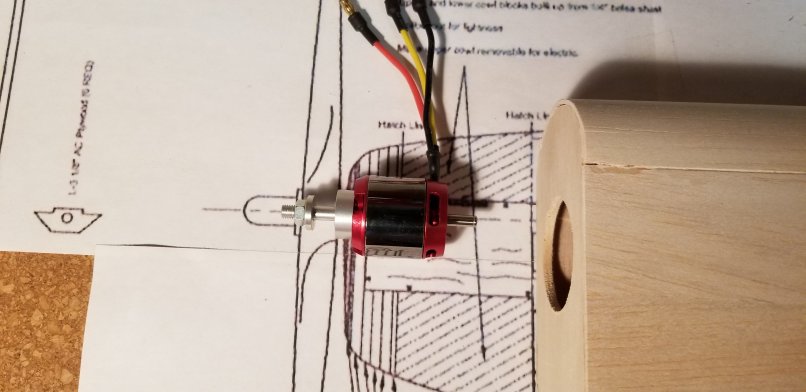
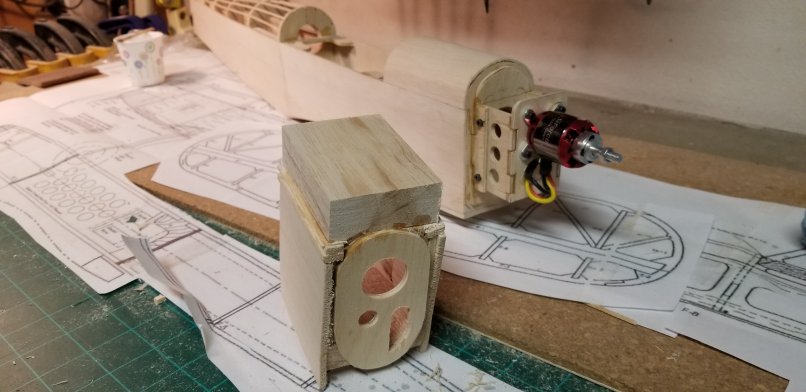
Since the mount needs to be strong, I’ll be using 3mm thick aircraft plywood. Using epoxy, I add an additional bulkhead, cutting slots with my Dremel tool to accommodate mounting brackets. I use screws and nuts to make the entire mount removable. By replacing these metal screws with nylon, I could create a breakaway point here. Not yet.
After creating two unusable mounting plates, I finally get it right on the third try.
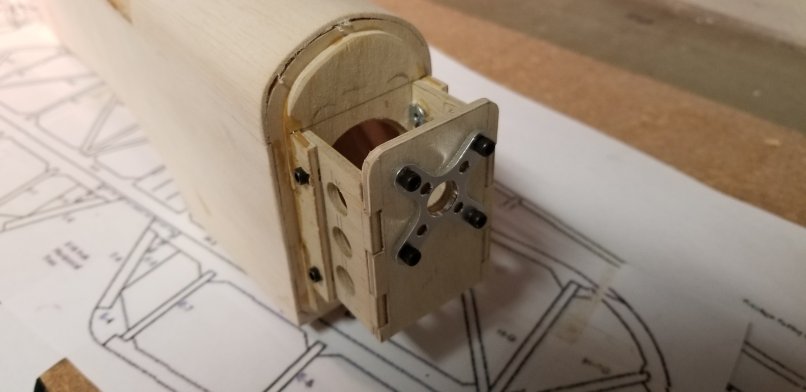
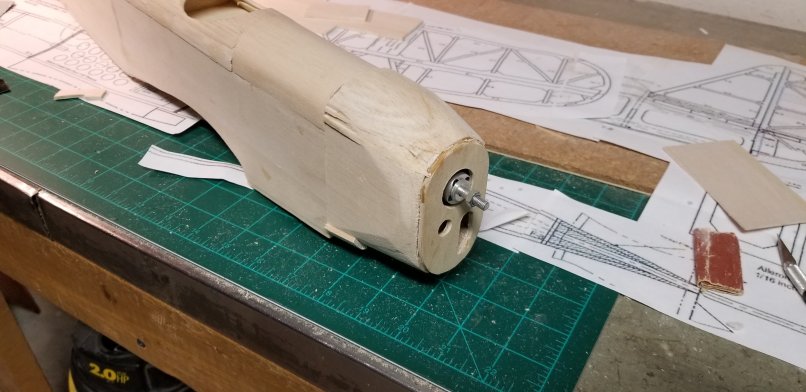
Then, I attach the motor. I’ll build my cowl around this.
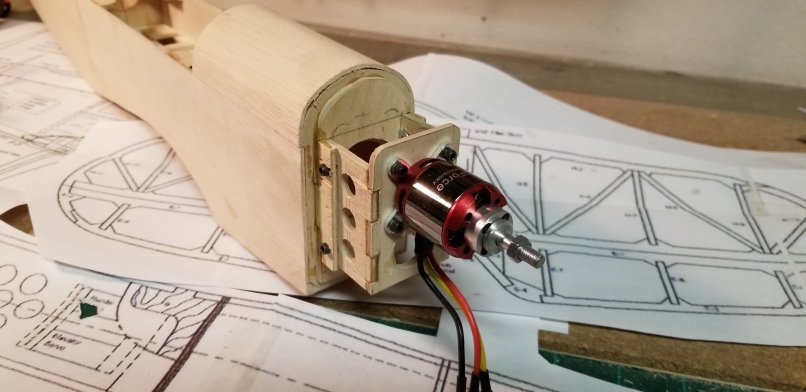
Thursday, November 2 – Saturday, November 3
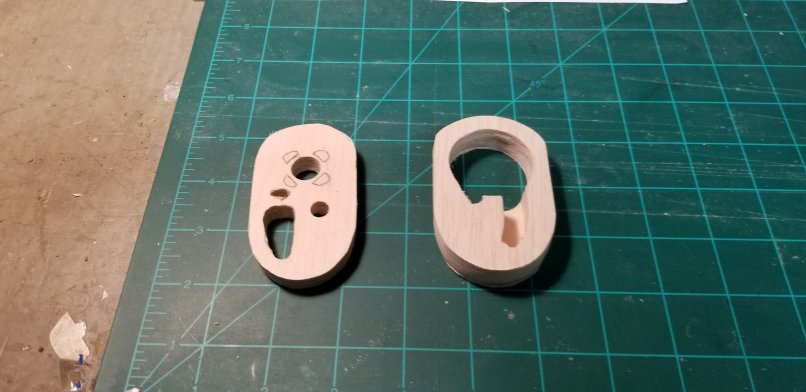
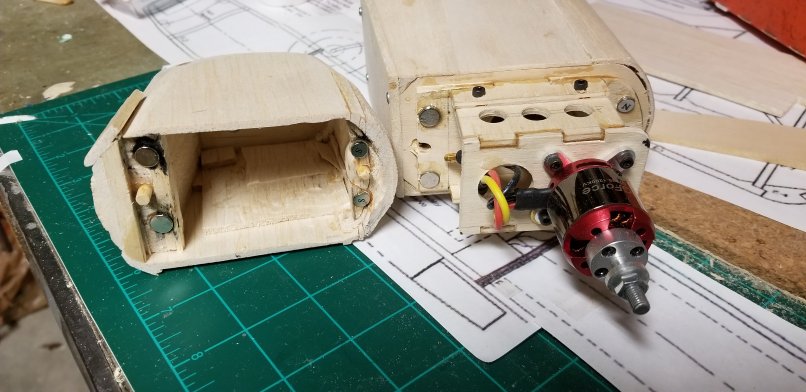
Most kits that I’ve built in the past provided a lightweight plastic cowling of some sort. I don’t have that luxury with this scratchbuilt plane. The plans actually call for a wooden cowl, but since I have designed my own motor mount, I may need to continue trailblazing by creating a cowl that will be in perfect scale while remaining functional. Common sense dictates that the motor should operate freely and the cowl should be attached securely, but allow easy access to check wiring or change out the engine. Being lightweight is also a plus. Four magnets should hold everything together nicely.

It doesn’t matter how boxy the outside is, as long as there is enough balsa to shape seamlessly to the fuselage. Using quick-drying CA glue helps tremendously. Patience is definitely a virtue, as well…
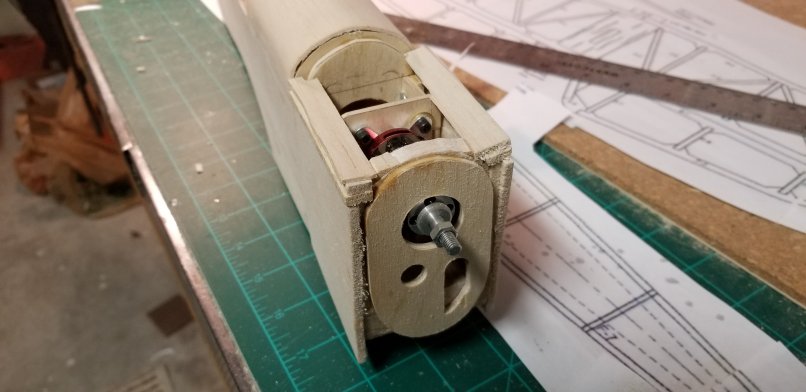
After much trial and error, the cowl fits around the motor, allowing it to spin. Here is the roughed out cowl before shaping and adding the dowels and magnets.
Here it is starting to shape up nicely. I’m used to sanding walnut and this is so much easier, so I have to go easy.
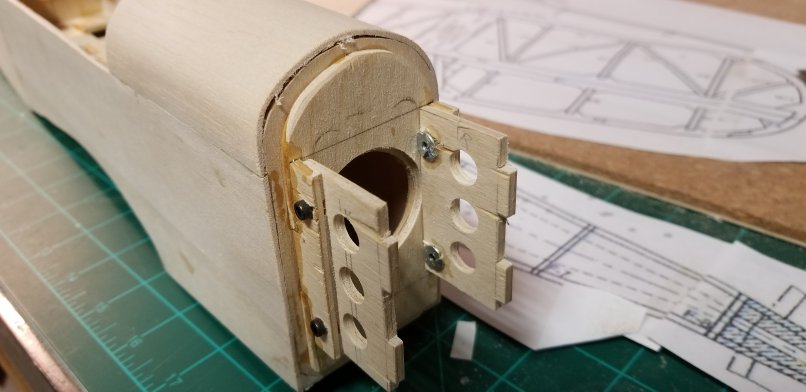
I inserted dowels into the top and bottom to keep the cowl from shifting. Four small but strong magnets will (hopefully) keep it in place.
November 12, 2018
I finally finished shaping and sanding the cowl.
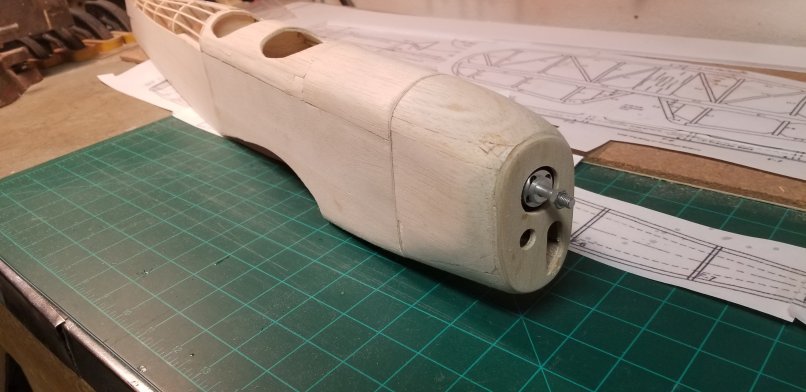
I’m very pleased with how this turned out, although I can’t help but think that this may be a weak spot in the design. The cowling is only secured by magnets and dowels. It appears to be strong enough, but I am not sure of the in-flight forces which will be encountered. If it fails, I’ll just have to rebuild it, with an improved design. It’s all a learning process.